Posted by OurVolvo.com on Oct 9, 2016 in
1999 Volvo V70 1. Alternator bearing ceases every 30 – 40,000 miles or after long periods of not driving:
- Use lots of PB Blaster and if you are lucky it may start turning again
- Do not bring a torch under there – it will catch everything on fire
- Do not beat with a hammer. There’s no beating it out of place.
- And now that you are in this boat, do not get an auto store “new” alternator that will go bad in less than 50,000 miles again
2. In some cases (like mine) the bottom nut and/or alternator bolt ceases and cannot be undone for the life of it:
- Your local repair shop will charge you $55-77 to remove it
- If you look under there, you will see the nut could be reached properly only after taking the front driver side tire off
- In my case no power wrench (electric or compressor) worked – did not even budge it
- Use a longer extension to reach from outside the fender where you can attach a longer ratchet and push with your body forward
- If you are lucky the nut will come off. But even if it breaks proceed to step 3
3. Reach with a thinner size 14 wrench and unscrew one of the two nuts that hold the massive alternator bracket. The other one you can reach with a power or regular wrench
4. If your long bolt that goes through the alternator housing and holds it to bracket has ceased like mine did, there’s no taking / beating / torching it out. Drill it out very carefully and release from the bracket
5. Once again, the store “new” alternators at $70 are rebuilt and refurbished. So, just go to your local alternator repair shop and get your original Honda CRX alternator rebuilt there for $30-40 preferably with American made bearing, magnets and brushes inside
After you have done all of the above:
(1) installing the bracket first
(2) then run the long bolt and
(3) the newly rebuilt alternator should take less than half an hour
(4) fasten the adjuster bolt on the top of the alternator
(5) connect the (6) ground and then (7) the electric connector
(8) only after properly fastened, grounded and connected re-connect the battery and you are good to go
In some rare cases (like it was mine) the check engine light may come on. Check and replace any blown fuses. Disconnecting the battery for 20-30min. recycles the computer and removes the check engine light too.
Tags: 1989, 5, alternator, CRX, DIY, Honda, majorly, replacement, wrong
Posted by OurVolvo.com on Sep 9, 2016 in
1999 Volvo V70  I love Volvo cars. Need I say it again?
I have owned three solid Swedish made machines. My first Volvo was a 1993 940, which was that close from half a million kilometers if it was not for the 2011 tornado storm that smashed it. My second Volvo was a 1995 460 known across Europe as the “Bodyguard” and for a reason. And the 3rd one of those is the famous 1999 V70 station wagon.
Now, just about everyone I know who has an older V70 which VOLVO upgraded with AWD or Turbo has had trouble with at least one of these and in some cases with both them. One would think that if you have the classic V70 NR you will not have many problems with this heir of the historically solid 740 models. That is not the case as even without AWD or Turbo, the classic V70 has at least 5 weak areas that must be repaired at one point or another.
- Weak guillotine on the starter / steering wheal lock assembly. DIY cost with dealership parts $260. Call Don Snyder at Darrell Waltrip Volvo Subaru for a fix at 615-599-6294 (direct) or 1-800-679-6124 (toll free) or Don.Snyder@HendrickAuto.com and read 1999 Volvo V70 Ignition Switch and/or Key Lock Cylinder Problem with Key Rotating Freely at 360 Degrees
- Soft and easily gone bad upper engine mount bushing – after market replacement is about $30 on the internet
- Factory recalled and still going bad ETM unit (manufactured by FIAT), which will basically put your car out of commission if you don’t want to spend the extra grand for a 45 min. fix and VIN reprogramming at the dealership – see Don’s website. Except if you can program it with the VIN you can’t do it yourself so repair costs $960. See our Electronic Throttle Module (ETM) Problem 1999 Volvo V70
- Poorly designed ABS unit, which is even more unreasonably placed directly at the heat stream of the so ever solid 2.4l 5 cylinder Volvo engine. When this ABS goes south (both figuratively and literary in the heat of the South, that it will turn off your speedometer and all other instruments on the dashboard, kick the car into safe mode, disable overdrive where you cannot go over 30 mph and to top it off turn the engine light off like it’s the end of the world (or at least the end of your car). “The Swedish,” as they often call it, was made for Sweden winters not for the summers of the South. It will crank at 40 below with no problems, but its electronics would go bad during a long hot southern summer. See the easy and cheap temporary fix for Volvo V70 ABS light on, speedometer dead, going to safe mode and loosing power with possible check engine light on or call Matt Pollack for under $100 DIY permanent and proper fix Midwest-abs.com
- Weak electronic central locking unit and gas door that melts under the heat. Yes, various parts of the locking system stick when the car is under extreme southern neat 90-100F. The door locks start working half way. You can use the key to unlock driver door if needed. But when it gets to the gas door lock you have to use the emergency release well into the rear wall above the tire. Or just break it if it leaves you lock at a gas station with an empty tank.
So adding it all together, just for these 5-6 things you will spend $1,600 easily just for parts. If you want it done at a dealership the rate is about $120 per hour with mandatory computer inspection (one work hour cost of $120) and at least another hour of labor.
With this mind, yes I think Volvo owes all V70 owners an apology. And why not a free car replacement for being left with a car load of people on the side of a lonely country road in a dark rainy night? And then having to pick up a pretty penny bill at the local Volvo dealership.
And one last remark about the 3rd row seats not being part of the standard package of the V70. Let’s face it on this one! If you are going to build a solid and safe family station wagon with a 3rd row capabilities frame and chassis, and sell it for 30 grand, you may just as well install the $250 3rd row seat and get it over with. Just saying…
Tags: 5, apology, defective, features, free, owes, owners, reasons, replacement, v70, vehicle, Volvo
Posted by OurVolvo.com on Aug 20, 2012 in
1999 Volvo V70 How To Change The Ignition Switch on a Volvo 850
By NYC-Volvo
SOURCE: http://www.matthewsvolvosite.com/forums/viewtopic.php?f=1&t=37398
I just changed the ignition switch in my 1996 850 R, and I’d like to share the process with you. I’ve taken photos to make it easier for you to follow along. I rate this job as easy. I am not a mechanic, but I am handy. This repair took me 18 minutes from start to finish. So that 18 minutes includes the time it took me to gather my tools, go outside to the car, do the repair, take photos, clean everything up, and put my tools away. 18 minutes… it was much quicker that I expected.
Tools you will need
· Slotted screwdriver
· #25 Torx driver (the shank must be at least 3.75”)
Prepare your work area
· Move the seat back
· Adjust the steering column all the way out and down
· Make sure the engine is not running and the key is in the off position
Instructions
The following photo shows the underside of the steering column…
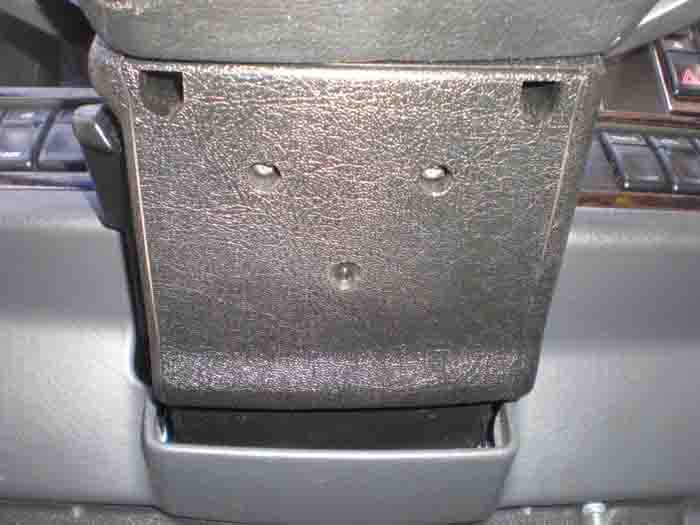
There are four #25 torx screws that hold both the lower and the upper cover to the steering column. You cannot see the upper cover in this photo, all four screws are accessed via the lower cover. The red circles show where the screws are for the removal of the upper cover. The yellow circles show the screws that hold the lower cover. Please take note that the screws for the upper cover are recessed, and you will need a #25 torx driver with a minimum of 3.75 inches of shank to reach in.

First remove the two screws holding the upper cover, and lift the upper cover up to remove it…
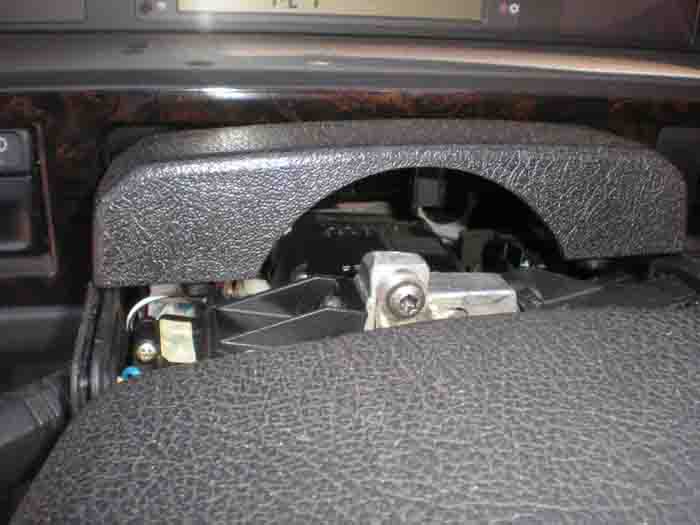
Remove the two screws holding the lower cover. To remove the lower cover, you will need to lift it over the ignition key area as you pull the cover down. Once you have the lower cover off, you will have the necessary access needed for this job…
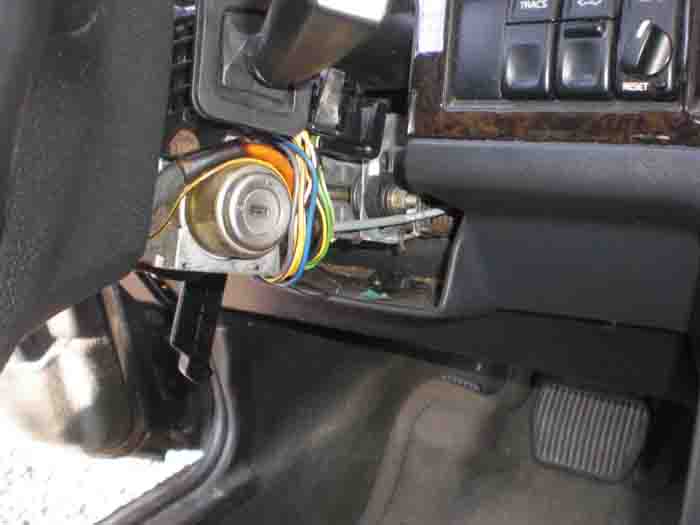
You are now ready to change the ignition switch…
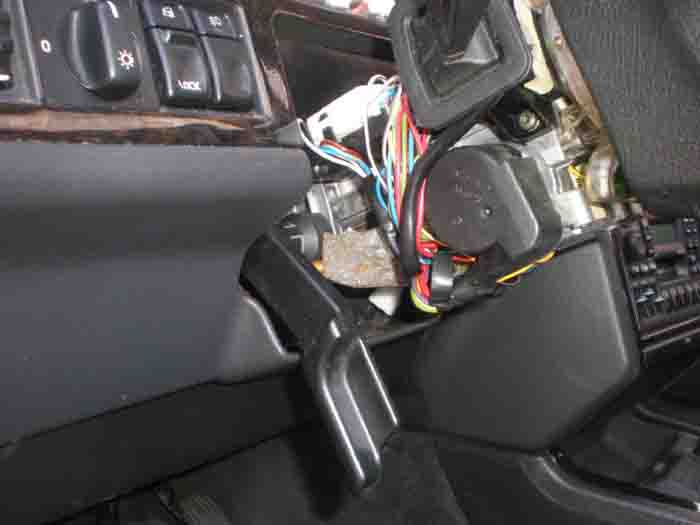
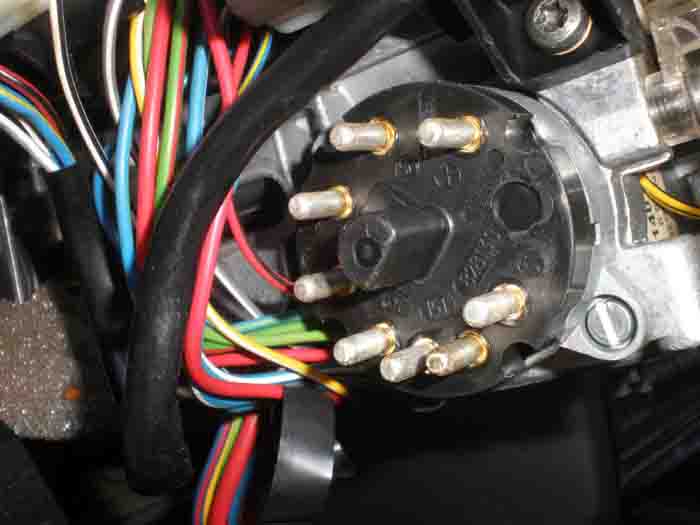
Next, remove the wiring conncetor from the ignition switch. I have circled the wiring connector in red…
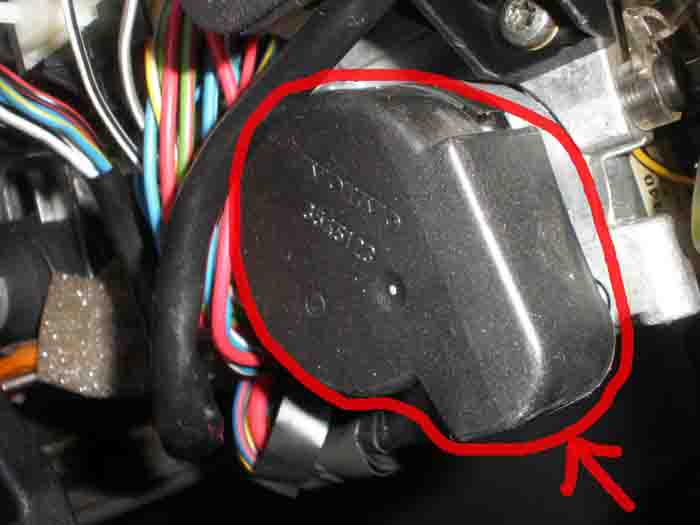
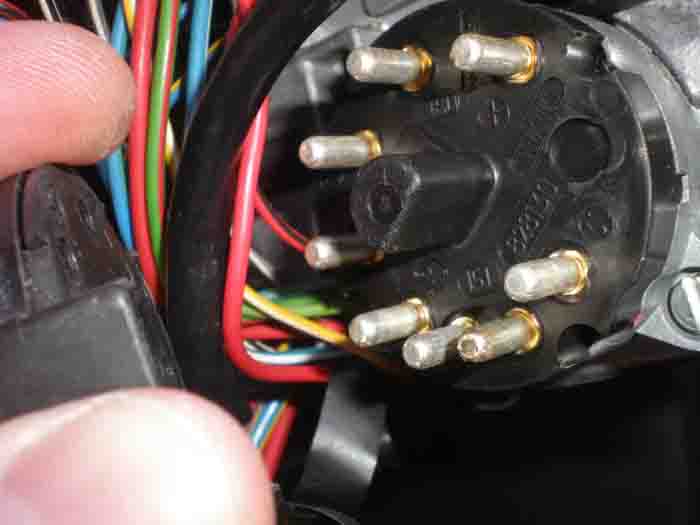
Hold the connector firmly and pull it out with a light rocking motion. Be careful not to damage the connector…
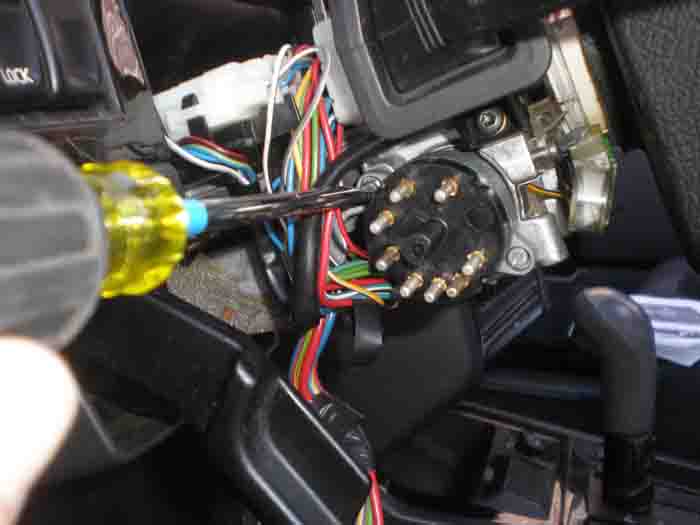
Next, using a slotted screwdriver, remove each of the two screws holding the switch in place…
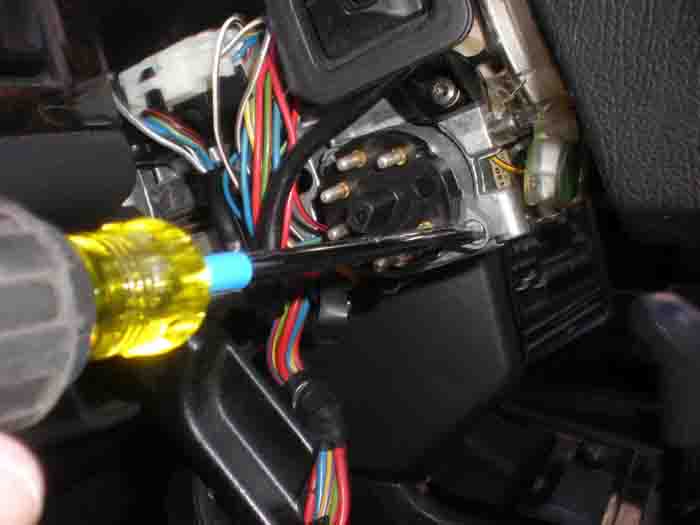
You are now ready to install the new switch. You need to ensure that the switch lines up with the position of the key. To do this, put the ignition key in the keyhole, put the new ignition switch in place and hold it witih one hand (do not screw it in yet), turn the key with the other hand until the key and the switch line up. You will know when it is lined up becuase the new switch will be seated firmly in place. Once everything is lined up, continue to hold the new switch in place, and remove the key from the ignition…
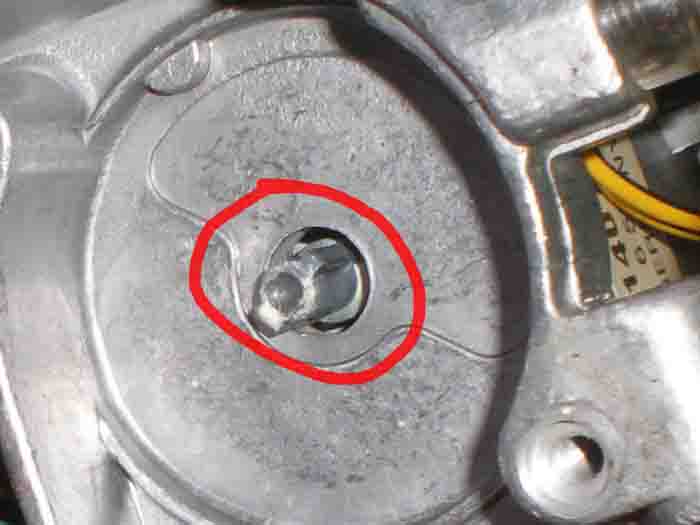
Secure the ignition switch with the two screws…
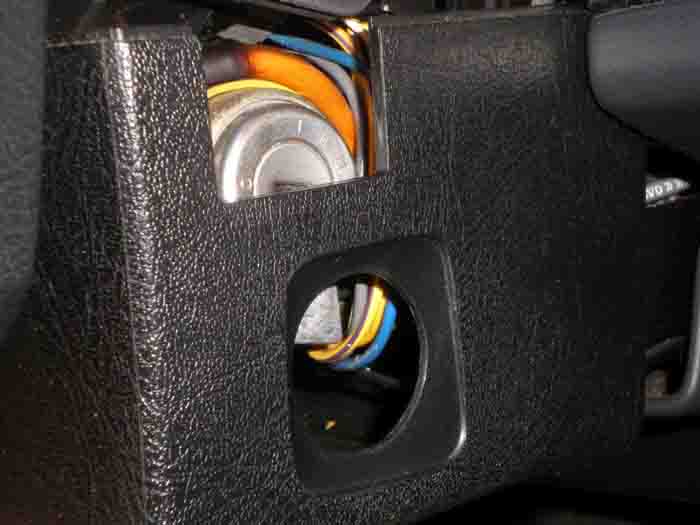
Reinstall the lower steering column cover. Be careful to get it into place over the ignition, and be sure to line up the rubber from the directional stalk and the wiper stalk. Fasten with two torx screws…
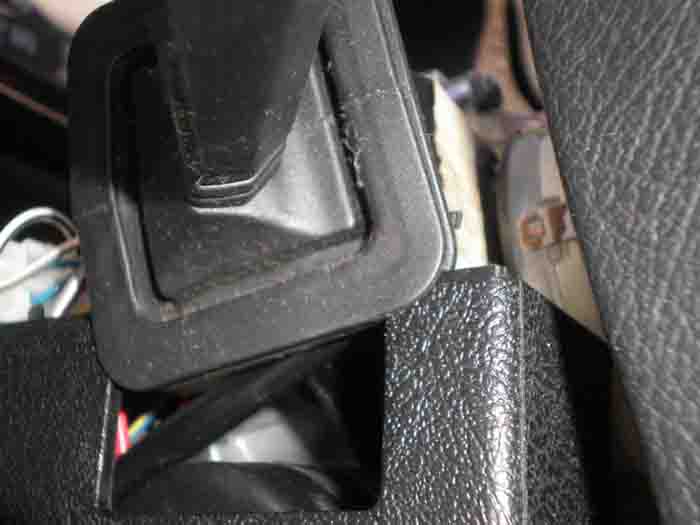
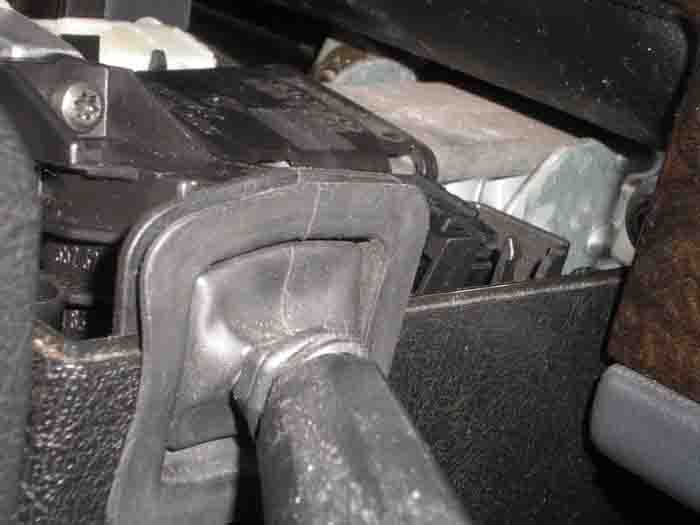
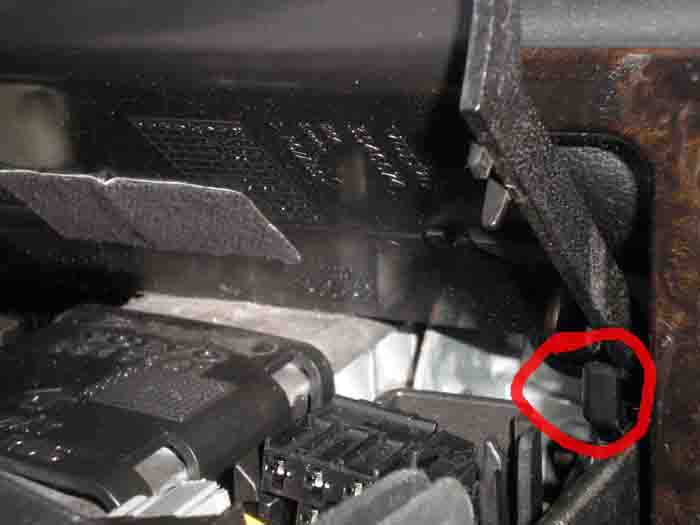
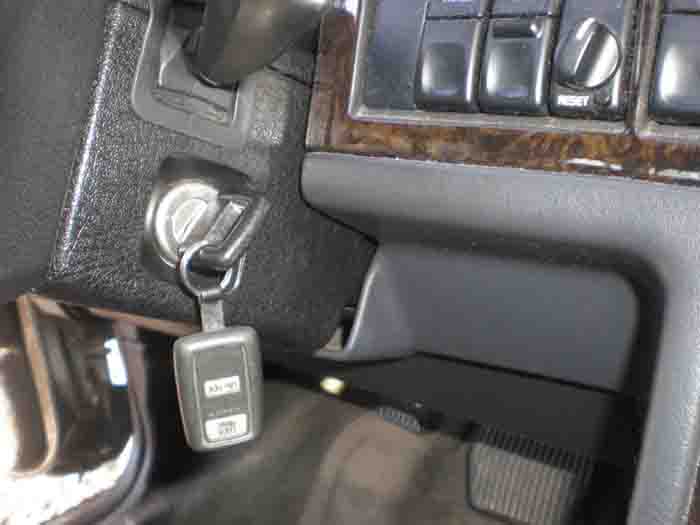
Reinstall the upper steering colum cover. Be sure to slide the rear of the cover in first and make sure it “hinges” (see below) so it will seat properly. Install the two screws to secure it in place…
Tags: 850, ignition, replacement, switch, Volvo
Posted by OurVolvo.com on May 30, 2012 in
1993 Volvo 940 One Year Latter after the April 2011 Tornadoes- My little step-brother Honda CRX 1989 is back up and running.
Just a few dings and dents but we are good to go thanks to:
1.Some guy on craig’slist.com in Atlanta Georgia for the Hatchback. Funny story because when he said he was selling a Honda CRX 1989 hatchback he meant just the hatchback. Everything down to the windshield wiper, struts, you name it were removed. But it still did the job and we agreed on an acceptable price after seeing it’s condition.
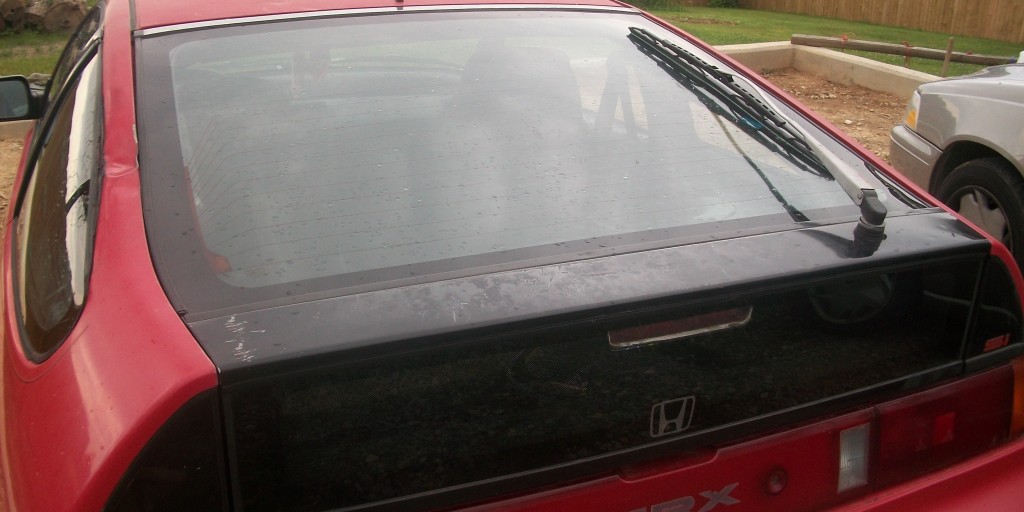
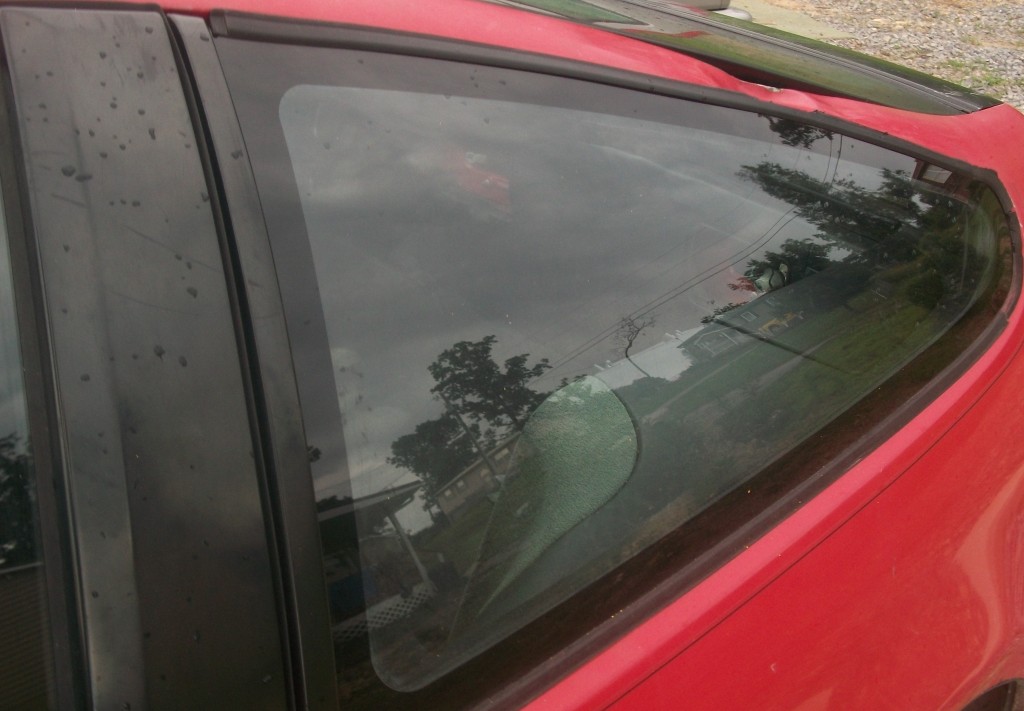
2. Charlies Used Auto Parts & Receyling in Dayton, TN for the Honda CRX 1989 passenger side quarter panel glass. They are family owned and operated Christian business, however, if you go to get anything from this Salvage Yard you need to pay upfront and have them pull the piece which can take sometime because their yard is 5 or so acres. We called saying we were coming from Cleveland, TN and would be there in about 1 hour to pick up the part and then when we got there they say it will take about an hour to pull it and they would need payment none of which we were told over the phone. This is understandable because I’m sure a lot of people say they are coming and don’t but it really puts a damper on the honest ones when they are not told this info and we had to wait for about 2 hours after traveling so long.
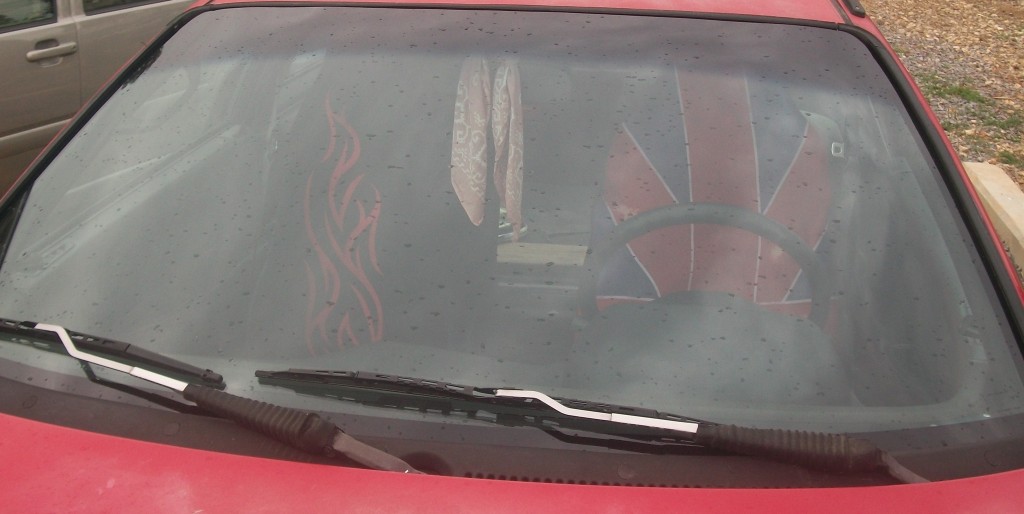
3. Gary and Dewayne at D-H Top-Auto Glass (1402 Jones Street SW-Cleveland, TN) for the Honda CRX 1989 front windshield and installing the quarter panel. They are just two good ole country boy brothers in business for past 50 or so years. It is businesses like these that keep our country alive. With a shake of the hand on a gentleman’s agreement they ordered and installed the glass without any deposit. And they offered the best price over Safelite Auto Glass, Abra Auto Body and Glass or any other off brand competitor.
Also special thanks SVOboy for his tutirial on Rear wiper and motor replacement for Honda CRX
Tags: 1989, Atlanta, Charlies Used Auto Parts, CRX, D-H Top-Auto Glass, Honda, replacement


