Posted by OurVolvo.com on Oct 10, 2016 in
1999 Volvo V70 Years ago when we first got out Volvo V70 we published this DIY quick fix for the sticking ABS that causes the driver all sorts of other problems. But the truth of the matter is that it is just a quick fix.
As time progresses, the ABS unit performance will not improve. On the contrary, every time the temperature begins affecting the unit or the spaces, new problems would occur. We dealt with it for a while with just replacing the spacer with a new one (folded empty Wal-mart gift card), but this was also just a temporary fix.

There is an easy DIY permanent fix by getting a refurbished ABS module for under $100 and replace it yourself for under an hour. After a couple of years of dealing with ABS failure, which blocks the dash board instruments, brings on the check engine light, overrides the 4th gear and puts the whole car in a limp mode where you cannot go over 30 mph, we finally resorted to a permanent fix.
Matt Pollack of Midwest ABS Exchange and Repair provided a fully working and tested refurbished ABS Volvo module which has now worked without any problems for 3 months on out 1999 V70 station wagon. While the ABS plastic spacer would provide you with a quick temporary fix, it is well worth investing the money to fix your ABS permanently.
Tags: abs, DIY, fix, permanent, sticking, unit, v70, Volvo
Posted by OurVolvo.com on Sep 9, 2016 in
1999 Volvo V70 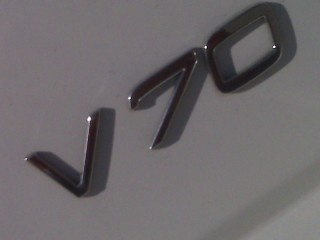 I love Volvo cars. Need I say it again?
I have owned three solid Swedish made machines. My first Volvo was a 1993 940, which was that close from half a million kilometers if it was not for the 2011 tornado storm that smashed it. My second Volvo was a 1995 460 known across Europe as the “Bodyguard” and for a reason. And the 3rd one of those is the famous 1999 V70 station wagon.
Now, just about everyone I know who has an older V70 which VOLVO upgraded with AWD or Turbo has had trouble with at least one of these and in some cases with both them. One would think that if you have the classic V70 NR you will not have many problems with this heir of the historically solid 740 models. That is not the case as even without AWD or Turbo, the classic V70 has at least 5 weak areas that must be repaired at one point or another.
- Weak guillotine on the starter / steering wheal lock assembly. DIY cost with dealership parts $260. Call Don Snyder at Darrell Waltrip Volvo Subaru for a fix at 615-599-6294 (direct) or 1-800-679-6124 (toll free) or Don.Snyder@HendrickAuto.com and read 1999 Volvo V70 Ignition Switch and/or Key Lock Cylinder Problem with Key Rotating Freely at 360 Degrees
- Soft and easily gone bad upper engine mount bushing – after market replacement is about $30 on the internet
- Factory recalled and still going bad ETM unit (manufactured by FIAT), which will basically put your car out of commission if you don’t want to spend the extra grand for a 45 min. fix and VIN reprogramming at the dealership – see Don’s website. Except if you can program it with the VIN you can’t do it yourself so repair costs $960. See our Electronic Throttle Module (ETM) Problem 1999 Volvo V70
- Poorly designed ABS unit, which is even more unreasonably placed directly at the heat stream of the so ever solid 2.4l 5 cylinder Volvo engine. When this ABS goes south (both figuratively and literary in the heat of the South, that it will turn off your speedometer and all other instruments on the dashboard, kick the car into safe mode, disable overdrive where you cannot go over 30 mph and to top it off turn the engine light off like it’s the end of the world (or at least the end of your car). “The Swedish,” as they often call it, was made for Sweden winters not for the summers of the South. It will crank at 40 below with no problems, but its electronics would go bad during a long hot southern summer. See the easy and cheap temporary fix for Volvo V70 ABS light on, speedometer dead, going to safe mode and loosing power with possible check engine light on or call Matt Pollack for under $100 DIY permanent and proper fix Midwest-abs.com
- Weak electronic central locking unit and gas door that melts under the heat. Yes, various parts of the locking system stick when the car is under extreme southern neat 90-100F. The door locks start working half way. You can use the key to unlock driver door if needed. But when it gets to the gas door lock you have to use the emergency release well into the rear wall above the tire. Or just break it if it leaves you lock at a gas station with an empty tank.
So adding it all together, just for these 5-6 things you will spend $1,600 easily just for parts. If you want it done at a dealership the rate is about $120 per hour with mandatory computer inspection (one work hour cost of $120) and at least another hour of labor.
With this mind, yes I think Volvo owes all V70 owners an apology. And why not a free car replacement for being left with a car load of people on the side of a lonely country road in a dark rainy night? And then having to pick up a pretty penny bill at the local Volvo dealership.
And one last remark about the 3rd row seats not being part of the standard package of the V70. Let’s face it on this one! If you are going to build a solid and safe family station wagon with a 3rd row capabilities frame and chassis, and sell it for 30 grand, you may just as well install the $250 3rd row seat and get it over with. Just saying…
Tags: 5, apology, defective, features, free, owes, owners, reasons, replacement, v70, vehicle, Volvo
Posted by OurVolvo.com on Aug 22, 2016 in
1999 Volvo V70
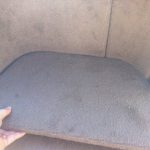
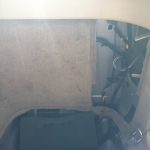
- Remove bottom part of right side cargo panel (Side which your gas tank is on) and small section of flooring.
- NOTE: You do not have to take the main large panel off. These panels are very fragile and sometimes do not go back on or break in the process.
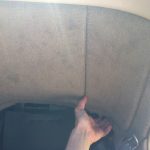
- Slightly pry open remaining side panel (part which is still attached) enough to reach hand behind panel. You will feel the metal frame of the car and wires.
- Beware that behind the carpet cargo panel there will be another metal panel in which the locking mechanism will be behind.
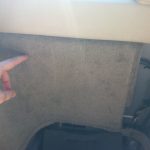
- There will be a wrapped cable with two wires which will be visible once you remove the panel. These are the wires which connect to the locking mechanism. Follow the cables with your hand to the end to locate the locking mechanism. Cables will be connected to a small box.
- Once you have located the small box of the locking mechanism, take your finger and reach behind until you reach the trigger and then pull to unlock the gas tank.
-
-
Take off bottom flooring.
-
-
-
Take off small side carpet panel. There is a small black cap you remove where fingers are and then you slide downward.
-
-
-
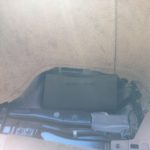
This is the exact location of the gas tank trigger.
-
-
The wire you will follow to the lock mechanism.
-

-
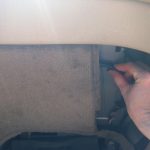
Panel behind which you reach your hand.
-
-
Gas tank trigger pulls towards you, rear of car.
Tags: 1999, 4, DIY, easy, gas, lid, locking, mechanism, release, steps, stuck, tank, trigger, v70, Volvo, wagon
Posted by OurVolvo.com on Jan 8, 2015 in
1999 Volvo V70 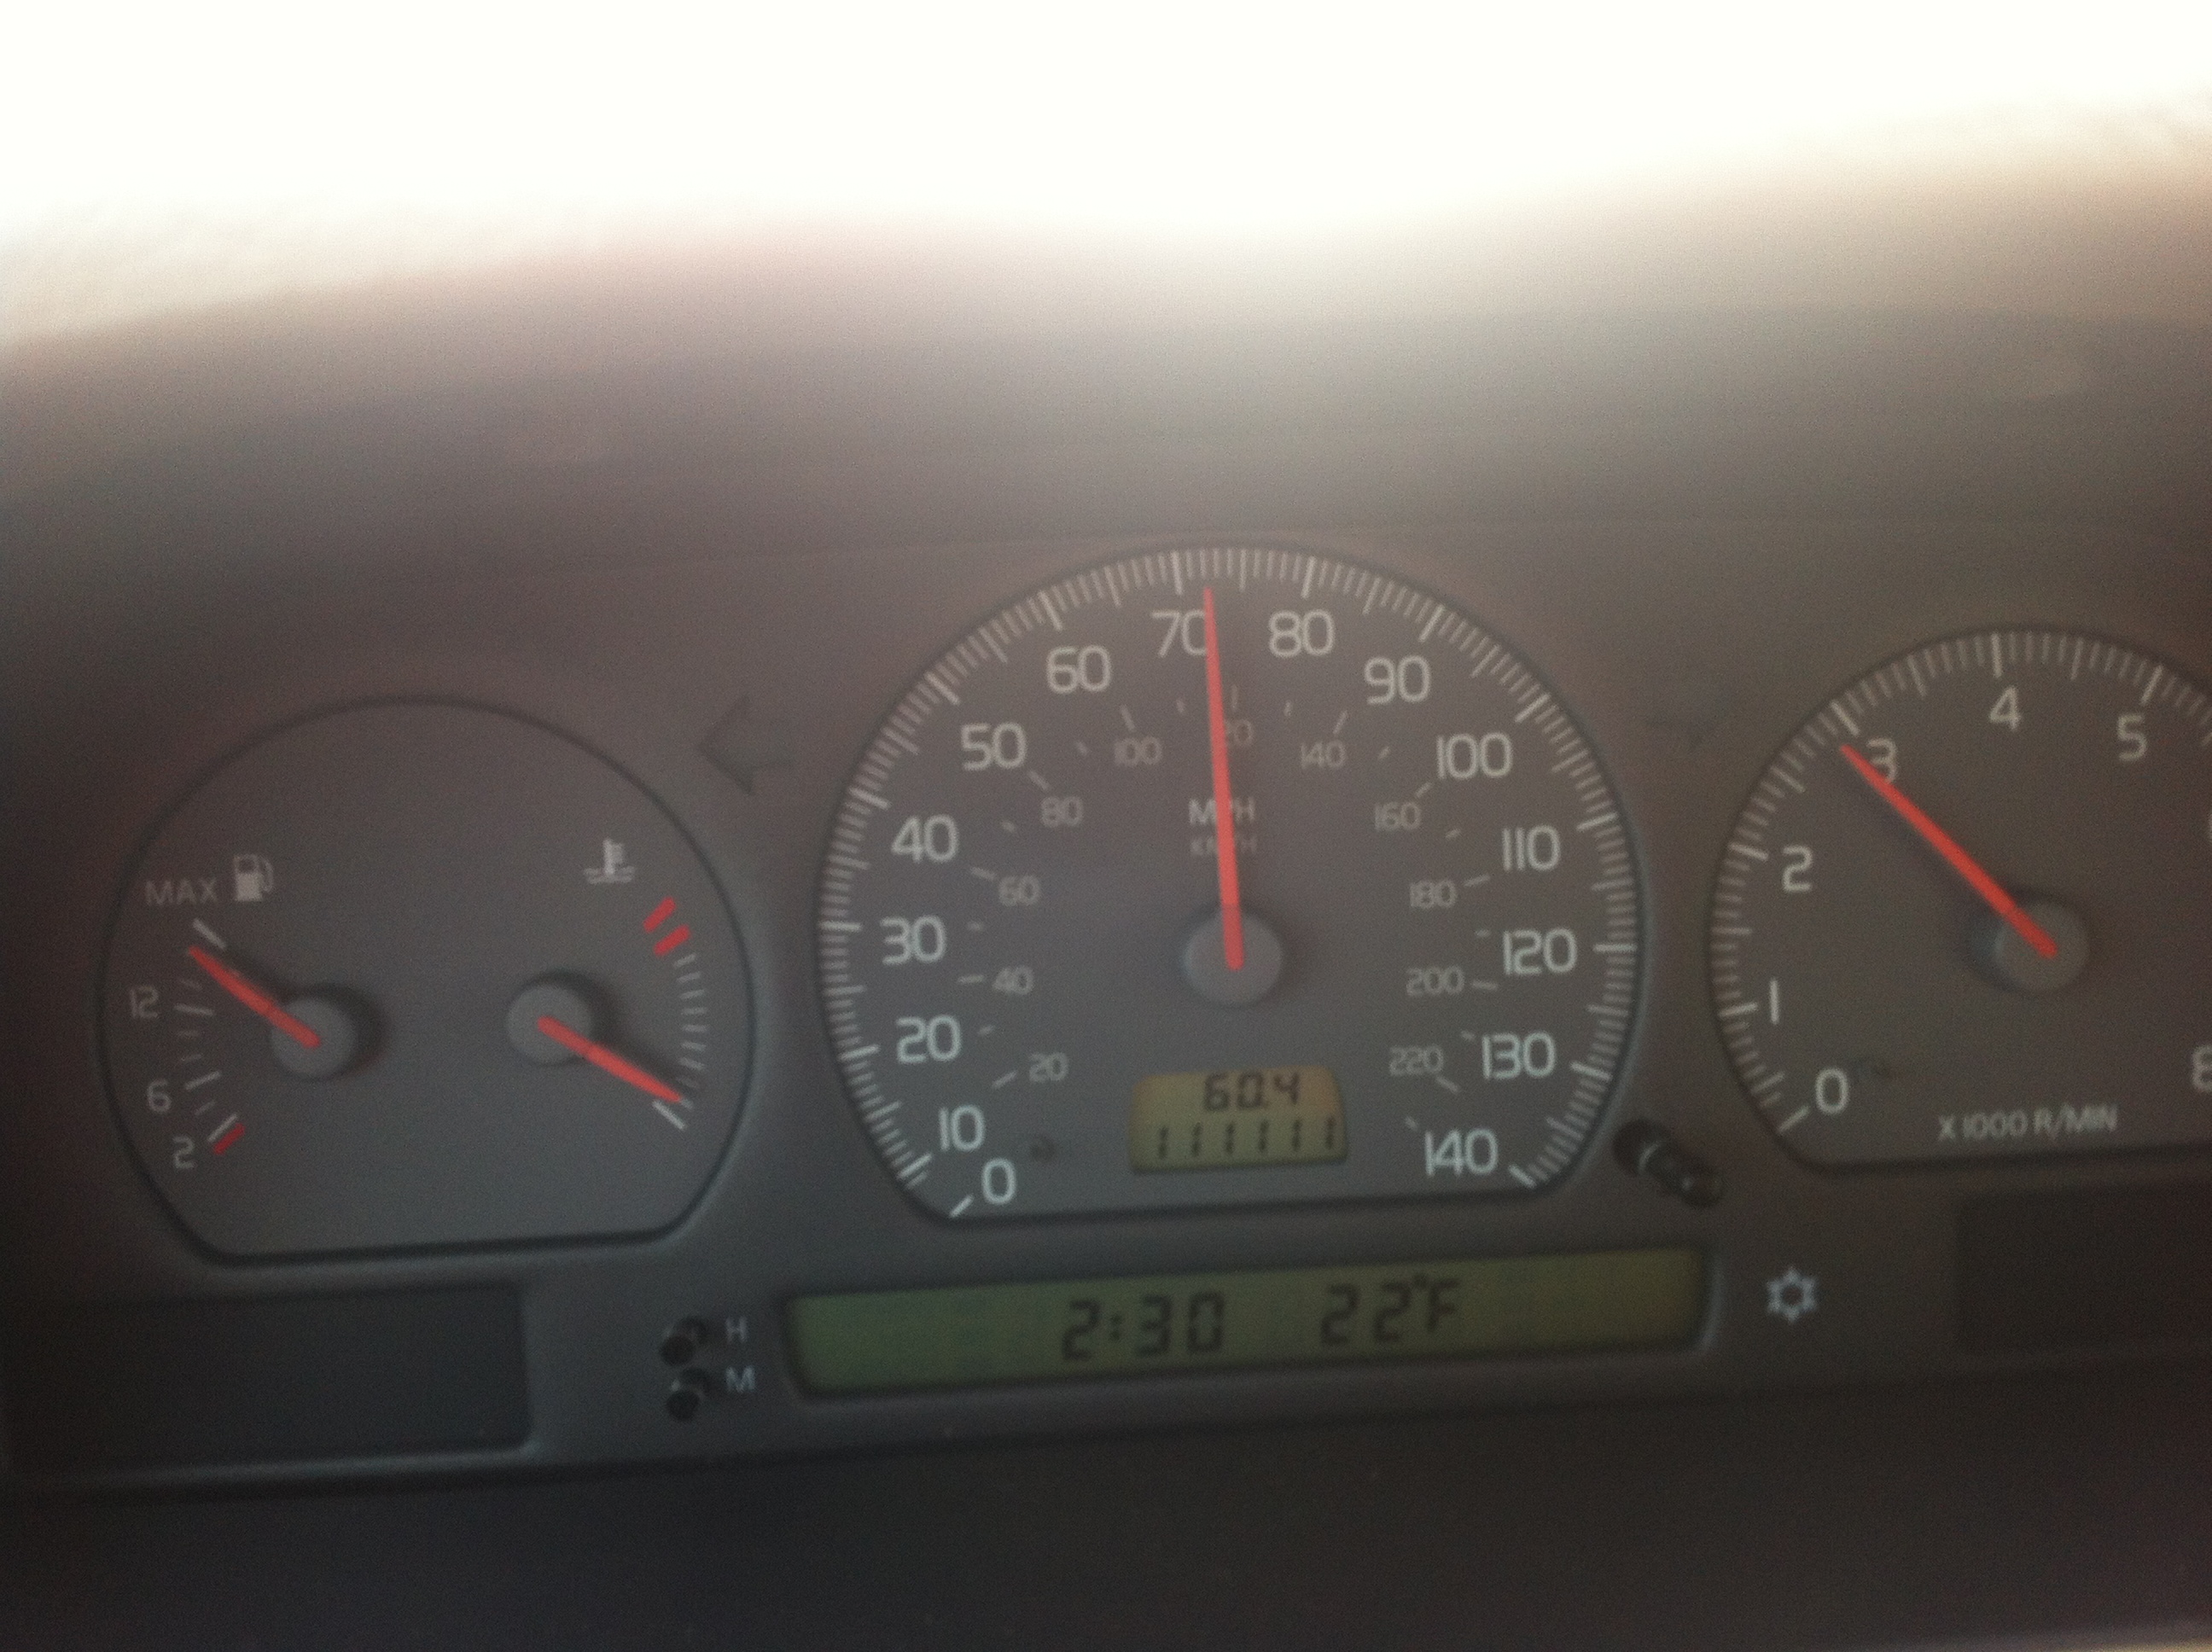
111,111 miles on 1999 Volvo V70.
Nevermind the speed, the outside temperature and most of all the engine temperature 🙂
Tags: 111111, 1999, miles, v70, Volvo
Posted by OurVolvo.com on Jun 23, 2013 in
1999 Volvo V70 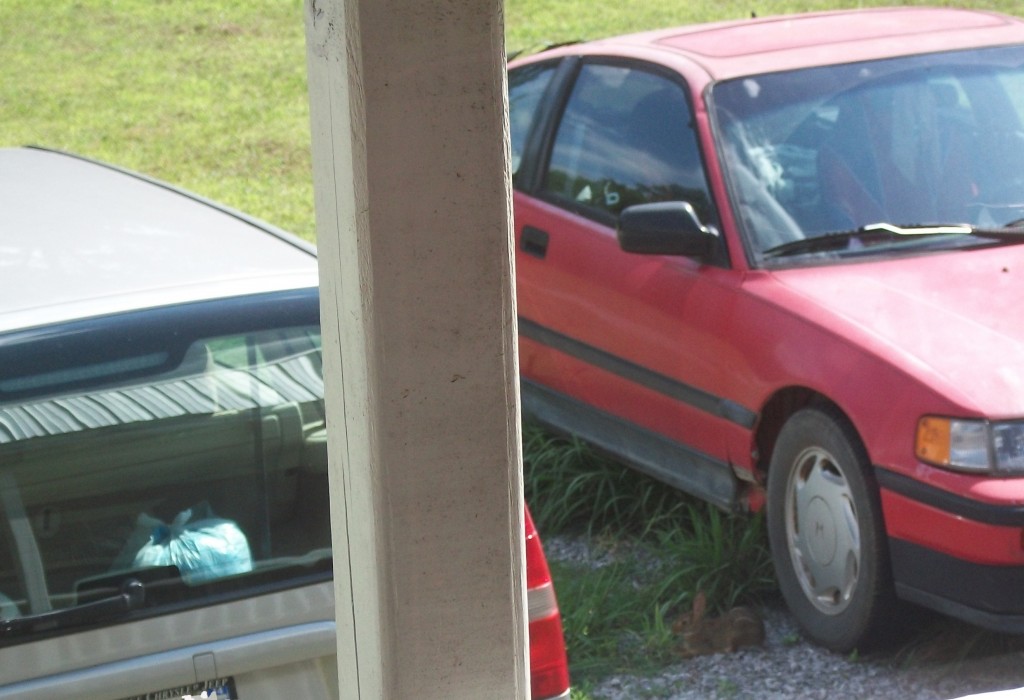
You see it??? Today I have a little visitor. It’s that time of the year because they are coming out of the wood works. But this bunny is my buddy. I don’t know who he favors more me the Volvo or my other buddy Honda CRX.
Tags: buddy, bunny, v70
Posted by OurVolvo.com on Nov 24, 2012 in
1999 Volvo V70 This happens in the beginning of the fall. It could be quite scary. The ABS light comes on randomly and as it persists the speedometer goes dead at zero while doing 60-80mph. As it persists the Volvo goes into safe mode (not passing third gear), looses power and eventually check engine light comes on. Possible codes P1057, P0600, P1081, P0722, P1054 and as usual most of them are only detected by the special Volvo code readers.
The problem is in the ABS module touching somewhere due to vibration and returning short signal. You can replace the whole ABS module which will cost several hundred dollars or use this easy fix described by Enes. I used a folded Wal-Mart card that is still doing the trick for our Volvo V70.
Having a problem with Abs and Traction control is not a rarity on a V70/S70 Volvo. It is a common and expensive problem caused mostly by the Abs Module. The right way to fix this is to get a new one put in. It does not come cheap though, it’s over $400 for a new one and $200 to rebuild

Is there a way to go around it? Yes, there is(sometimes). I tried this”unorthodox repair” on a 1998 V70 and it worked. Actually it’s still working 13 months later. It’s cheap and it required 15min of my time. Abs Module is located on the left side of engine compartment under the fuse box. Good news is…you don’t have to remove it at all.

The whole idea consist on putting some space between Abs pump and the Module. It can be done with almost everything: wood, cardboard, plastic. In my case I used a scrap piece of plastic.

Take the spacer and push it between the pump and the module. Make sure it stays tight and won’t fall while driving.
There we go..no Abs and Tracks light anymore and it’s working fine.

I tried this method on 3 different Volvo’s with the same problem and it worked fine on 2 of them. No guaranties though but you lose nothing by trying it anyway.
Now, don’t forget to clear your check engine light if it is still ON!
Tags: abs, check, dead, Engine, light, loosing, mode, power, safe, speedometer, v70, Volvo
Posted by OurVolvo.com on Nov 20, 2012 in
1999 Volvo V70 First of all, special thanks to DanDan the VolvoMan who we were able to find 3rd row V70 seats through his eBay store. Via his website http://www.resultsautoparts.com, Dan is running a family business which started back in 1972. If you need a Volvo part (or any other car) DanDantheVolvoMan is your man for the job.
Now, there is a YouTube 10-part video series done by a great Polish mechanic, but is quite hard to follow it while installing the seats. You can watch the videos for a reference if you’d like, but this work sheet may be much easier to follow while working.

A. First off, start with the back area:
(1) Remove the spare tire cover. You may later need to remove the spare tire and its plastic nest, so do it now while you are at it.
(2) Remove the two side covers by popping them off with the help of a big screw driver.
(3) Unscrew the two brackets (two screws each) supporting the rear hard cover.
(4) Slide out toward you the rear hard cover. Don’t try to lift it or pop it up. It is fixed by 2-3 brackets and easily slides out.
B. Now move to the rear seat area:
(1) Remove the rear seat arm rest covers. They easily pop out as you pull them out.
(2) Remove the two vents. They pop and slide out. The are not broken but factory precut so you can put the seat belt in them. Be careful that if you pry on them when cold they could break.
(3) Remove part of the door seal gasket to uncover the plastic side cover where the door closes.
(4) Then remove the plastic rectangle on the top where your seat belt will be attached and then the ceiling side plastic cover.
C. You are ready to install the seat belts:
(1) Start by unfolding some of the seat belt giving it enough slack so you can install it. If it is locked, you have to hold it straight and gently pull. It may take several pulls till you get hang of it.
(2) Fit the belt mechanism correctly on the frame and fix the bolt.
(3) Extend the belt to the ceiling and do the same with the belt hanger.
(4) You can now safely put back in place all plastic covers, the door seals and the rear seat arm rests.
D. Seat belt floor locks
(1) Fit the large T-shape metal frame in the provided hole to your left which is fixed with two bolts to the frame (one on your right side and on the bottom of the mechanism).
(2) You will need to mount the two brackets, which you removed in the beginning, to the back side of the backrest with the provided 3 small screws for each of them.
(3) You are now ready to slide the backrest piece into place.
(4) Once it is in position, raise it and mount the two lower brackets to the car frame. They may need to be pressed firmly and bent a little to fit just right over the two holes.


E. Last but not least:
(1) The small plastic lock may take most of your time, but it is important to tweak it just right so your 3rd row Volvo seat may securely lock when raised.
(2) You will need to cut just right through the vinyl seat cover after finding the small opening on your back right side of the seat just bellow the head rests.
(3) You will need two small ears on the bottom of your cut for the piece to fit just right.
(4) Once finished with the cutting, install the plastic piece starting by pressing first on the top and then on the bottom until it fits just right. Once in, slide it upward to snug and lock. If it does not lock your 3rd row seat will not be secure.
(5) Try if it works by raising your 3rd row seat. If installed properly, the lock sticks should lock securely and then easily release when the latch is pressed. If you run into the problem where the latch will not release properly you may need to cut a bigger hole.

F. You may also want to change the seat carpet covers if they are worn out.
(1) The one with the seat is attached with metal brackets to the hard cover and easily pops out when pulled firmly and then you have but a few screws to deal with while transferring the seats.
(2) The back rest, however, will need some modifications as the two head rests have to be attached to it, but only after you have cut through the wood in order to install the locking mechanism. Without it, your 3rd row seat will have nowhere to lock in order to stay in the sitting position.
Tags: 1999, 3rd, installing, row, seats, v70, Volvo
Posted by OurVolvo.com on Aug 5, 2012 in
1999 Volvo V70 By: cn90
SOURCE: http://www.matthewsvolvosite.com/forums/viewtopic.php?f=1&t=34472
Car is 1998 Volvo V70 with 106K miles.
– Symptoms: sometimes cannot crank the engine, after wiggling the key a few times, then I can start the engine. It was intermittent, then it became permanent.
– Key can turn to Position I and Position II but not Position III (crank).
– Initially I thought it was the Ignition Switch (Electrical Portion to the LEFT of Steering Column), which was replaced but same symptoms! It turned out to be the Ignition Tumbler Lock (where you insert the key).
ATT: If you replace the Ignition Tumbler Lock (where you insert the key), there is NO need to remove the Steering Wheel at all! Read on.
1. Igntition Switch (Electrical Portion is PN 9447804, $50 at Volvo dealer. Do not use aftermarket part).
2. Ignition Tumbler Assembly (where you insert the key, Volvo PN is 8626325). I bought it for $210 from (ordered Monday and got it by Fedex on Saturday, wow fast service!):
Don Snyder
Darrell Waltrip Volvo Subaru
615-599-6294 Direct
Tel. 1-800-679-6124
Fax 615-599-6253
Don.Snyder@HendrickAuto.com
3. Tools:
– Torx set
– “Trim” Hammer (this hammer is used for carpentry trim job) is useful in this tight space
– 1/32” Nail Set
– Flat Screwdriver.
FYI, 1998 and earlier models probably have no anti-theft chip in the key. I connected the Ignition Switch (Electrical Part on the LEFT of Steering Column) to the connector and use a flat screwdriver (in the location labeled “Slot”) to crank and the car starts right up.

4. Shear Bolts are supplied with new Ignition Tumbler Lock Assembly. For those not familiar with Shear Bolts: these are used during assembly at factory, once the head on the Shear Bolt is tightened to a certain torque, the outer head snaps off, leaving a round inner head, making it difficult for thieves to remove. When you buy the Ignition Tumbler Lock Assembly, the Shear Bolts are supplied with it.
– During re-installation, I simply tightened the Shear Bolts snug without snapping the head off just in case I want to remove them later.

5. Have a look at the first picture above to be familiar with the setup:
– The LEFT side of the Ignition Assembly is the Electrical Portion of the Ignition: it turns I, II and III (crank).
– The RIGHT side of the Ignition Assembly (where you insert the key) can only be turned with the proper key and has a cable to control so you cannot remove the key if the car is not in Park. The RIGHT side turns the LEFT side via a flat piece of steel, pretty much similar to your lock at home.
Procedures:
1. Disconnect Battery Ground Cable for safety reasons.
2. Use a flat screwdriver to lift off the rubber trim, then lift the Upper Cover close to SW upward (#1), then slide it toward you so it slides out of the hook (#2).
The Lower Cover is secured by three (3) Torx #25 bolts. When removing the Lower Cover, pay attention to the part around the Lighted Ring: tug the Lower Cover outward a bit so it clears the Lighted Ring then remove it.

3. Remove Turn Signal Stalk and Wiper Stalk: Each Stalk is held by two (2) Torx #25 bolts.
4. Now you can see the Shear Bolt round head. At factory, the force used to tighten the Shear Bolt was not much, so with the Nail Set you can “chisel” it out. Angle the Nail Set in such a way that it angles about 45 degrees and tap it with the “trim” Hammer Counter-Clockwise to remove the Shear Bolt.
This is why you do NOT need to remove the Steering Wheel when replacing the Ignition Tumbler Lock Assembly.

5. Use a flat screwdriver to gently disconnect the Connector to the Ignition Switch (left side of Steering Column).
Disconnect the three Torx Bolts holding the Horn/Air Bag Ring (aka “Clockspring”).
Once the Shear Bolts are removed, the Cylinder Lock Assembly will fall down, so support it with your knees.

6. Now disconnect the Lighted Ring connector then remove the Lighted Ring from the Assembly.
7. To remove the Parking Release Cable: squeeze both sides of the tabs and use a flat screwdriver to gently pry it out. But first use a Sharpie to mark the depth of insertion of this Parking Release Cable so you know how much to insert it to the new Assembly. I think the key needs to be in position II to insert this Parking Release Cable.

8. If you decide to keep your Ignition Switch (Electrical Portion), then remove it using Torx #20 key, then transfer it to the new Ignition Tumbler Assembly. Note there are a large and a small notch so it can only be aligned 1 way.
However, at 100K, I think it is better to replace both the Ignition Switch (Electrical Portion) and the Ignition Tumbler Assembly.
9. Re-assembly is straightforward, make sure the notch on the Ignition Tumbler Assembly lines up with the Steering Column hole before you tighten the Shear Bolts. Again, I did not snap the heads of the Shear Bolts, just finger-tight and snug.
Also make sure the Rubbers around the Turn Signal and Wiper Stalks fit properly on the Upper and Lower Covers.

Tags: 1998, cylinder, DIY, ignition, lock, switch, v70, Volvo
Posted by OurVolvo.com on Jul 25, 2012 in
1999 Volvo V70 SOURCE: http://volvospeed.com/volvo_repairs_how_tos/miscellaneous_repairs_tips/replacing_cylinder_lock.html
Published on February 2, 2011 by Mr. Winkey
Tools Needed: Torx Paint Pen Picks & Sockets Bits Drill
This is a top level job and must be done with great care! If you do not feel comfortable or are not 100% sure of your skills I would highly recommend not attempting this job. Sometimes it is just better and more cost effective to pay a professional than to make a mess and have to pay one double!
Start by disconnecting the battery.
Remove the steering column covers with a 20mm torx driver.
Remove the ignition switch,wiper switch and turn signal switches all are 25mm torx.
Now remove the air bag module. You will need a long 30mm torx driver as shown below.

Unplug the module and lay it outside the vehicle with the back(metal part) laying flat on the ground.

Now remove the 18mm bolt securing the steering wheel. After the bolt is removed I paint mark the wheel to the column splines for alignment reference. Before you remove the wheel you must pin the air bag contact reel (I use a small phillips screwdriver) There is a small dimple behind the contact reel hole for proper alignment. If you accidentally release the contact reel the yellow tag attached to the wire gives specific instructions on how to re-align it. But we want to avoid this.
With the contact reel pinned you may now slide your steering wheel off.
The below picture pretty much shows all that is described here.

Now remove the torx screws securing the contact reel unplug and remove that as well. Keeping the pinning device(screwdriver intact)

There are numerous ways to seperate the 2 pieces of the lock cylinder, I prefer to drill them out and this is the method that I’m going to show. The below picture(a bit blurry) shows a pen(on the left) pointing to the one shear bolt that must be drilled out. You must then go to the other side and drill that one out as well. It makes no diffrence which side you start with they just both have to be removed. I put a small amount of grease on the 3/8″ drill bit to try and hold the metal shavings. I would recommend covering the dash and the floor as well to retain the metal shavings.

The picture below shows the LH shear bolt drilled through and the 2 pieces are seperated. Now I’m drilling the RH one.

Finish drilling through and remove the 2 pieces as shown. Notice the RH one is not completly drilled through but enough to bend it upward to clear the column.


With the old one out of the way wipe off any residual metal debris and install your new lock cylinder. The 2 bolts supplied are shear bolts as well(meaning the tops are meant to snap off when they are tightened) so care must be taken not to cross thread these. Position your lock cylinder and install your new shear bolts. I make both sides lightly snug then I go back and tighten them until the top of the shear bolt snaps off. The shear bolts are 40mm torx.
The below picture shows the new lock cylinder in place and now you are ready to reverse procedure and reassemble.

Tags: 99, c70, cylinder, including, lock, S80, up, v70, xc
Posted by OurVolvo.com on Jul 20, 2012 in
1999 Volvo V70 
A very special thanks goes to my friend Rob at http://www.volvotips.com/ who helped with priceless advice every step of the way.
BRIEF: While you may enjoy reading the full story of my searches for repair/replacement of my 1999 Volvo V70 Ignition Switch and/or Key Lock Cylinder Problem with Key Rotating Freely at 360 Degrees, it is more probable that you want to fix your car first.
The foremost and cheaper thing to do is check the electric part called the Ignition Switch. The ignition switch is attached with two screws on the LEFT side of the ignition assembly costs about $60 from either the store or the dealer (dealer probably will only bit around $10 more expensive but it will be a genuine part) and is recommended for replacement every 100,000 miles.
IMPORTANT: You can still start the car even if the switch or the ignition cylinder or something in the brackets is broken. Unscrew the ignition switch and with a key in the ignition, in POSITION II, insert a flat head screwdriver as shown on the picture below. Twist the screwdriver and the car will start.


The ignition switch comes in at least two versions in the newer models and with our luck came with both version in the 1999 V70 which could be determined by taking it OFF (not apart if you don’t want to break it) or by calling Volvo with your VIN number. The part is also available by BWD via Advanced Auto Parts and/or Autozone, if you don’t want to wait on the dealer. The part is NOT yet in their online catalogue, but it is found in the printed master catalog. 1999 Volvo with chassis starting from CH587537 take Part. No CS1054, while chassis up to CH587537 take Part. No CS1057.
I honestly to this day do not know which one goes on the Volvo with chassis No CH587537 and I do hope that as you are reading this you are realizing this is the chassis number of your Volvo. Anyhow, take the switch out and it will be obvious which one you need.
Finally, don’t try to fix this part, as there is not much to fix as you can see on the picture below. Just get a new one and replace it. I tried to fix mine when it was not broken and promptly broke it as a result. Volvo has done a really Mickey Mouse job on this one.
If you are seeing this part of your switch in photo below, you have done what you are NOT supposed to and opened the switch. It is very hard to get everything aligned back and re-shut. But of course curiosity kills the cat – but this is a $75.33 learning experience. Basically think, if you followed the previous directions and started the car with using a screwdriver, this part works fine.

Tags: 1999, 360, 850, degrees, DIY, freely, ignition, Key, part, rotating, S80, switch, v70, Volvo, with